Steps to Get a App Creation on Facebook
- Visit the Developer Portal
- Go to developers.facebook.com. Log in with your Facebook account.
- Enter Mobile Number
- Input your mobile number to receive a confirmation code via SMS or WhatsApp.
- Enter the received code and continue.
- Account Verification
- Navigate back to Facebook.
- Click on the “Get Started” button to verify your account.
- Confirm your email address and select your role.
- Create an App
- Click on “Create App.”
-
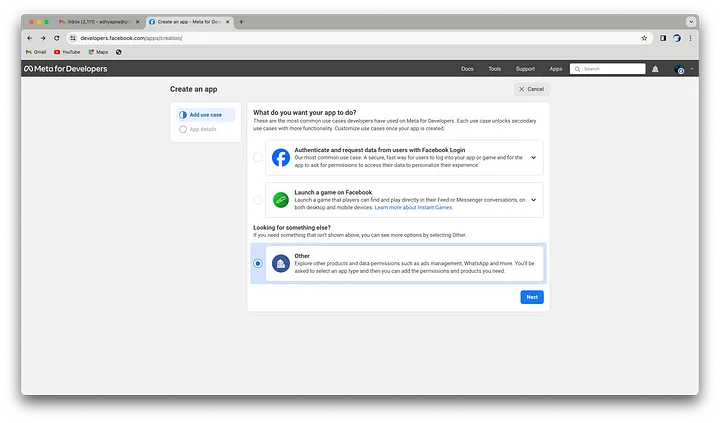
Select your use case. Choose “Other” as per your preference.
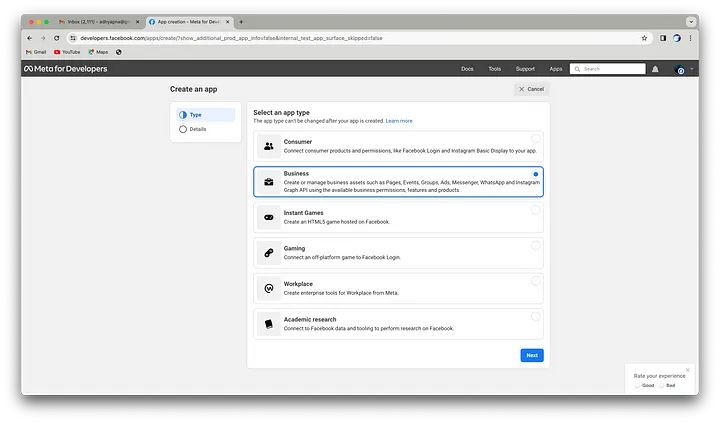
- Choose an app type; select “Business” and click “Next.”
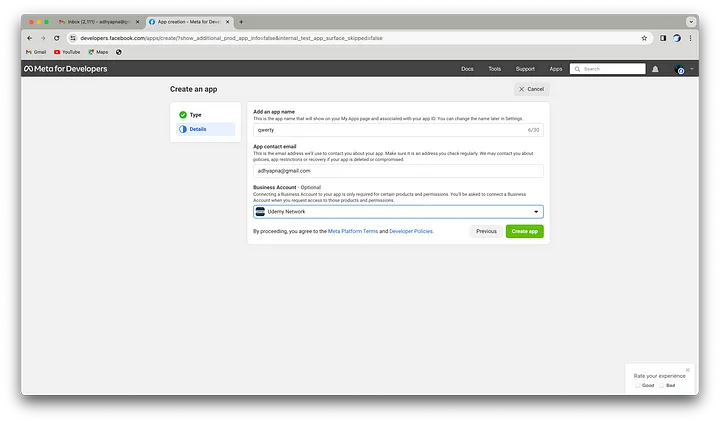
- Add an app name (e.g., “AIDemo”), enter your contact email, and provide your business portfolio optionally.
-
Click “Create.”
- Security Verification
- For security purposes, re-enter your password to continue.
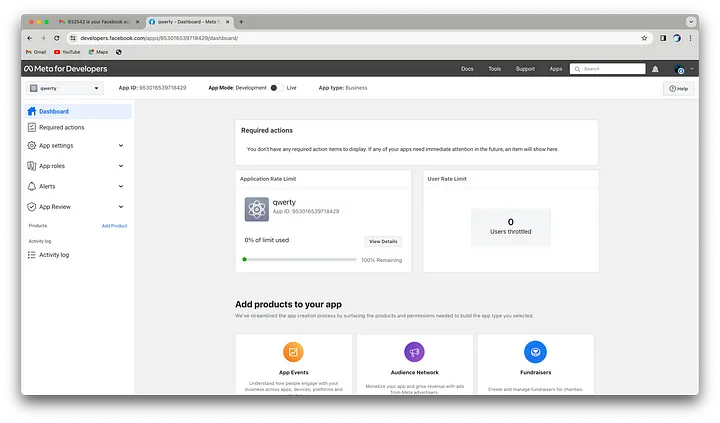
- After submission, you will be redirected to the dashboard of your created app.
- Configure Basic Settings
- Set up the basic settings for your app, including:
- Privacy Policy URL
- Terms of Service URL
- App Category
- Add Product
- Click on “Add Product.”
- Select “WhatsApp” and click on the “Setup” button.
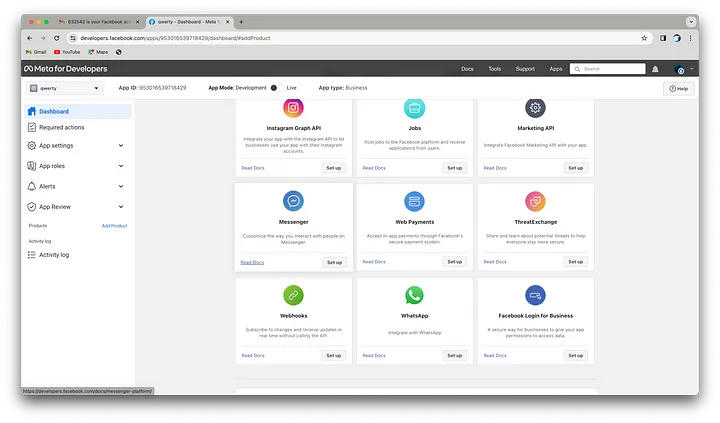
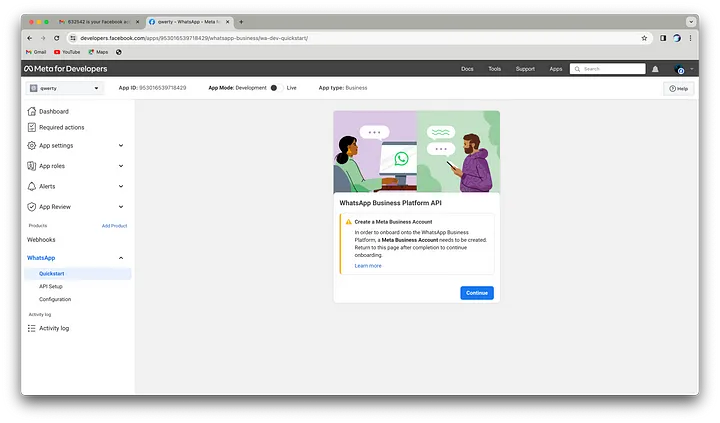
- Create a Meta Business Account
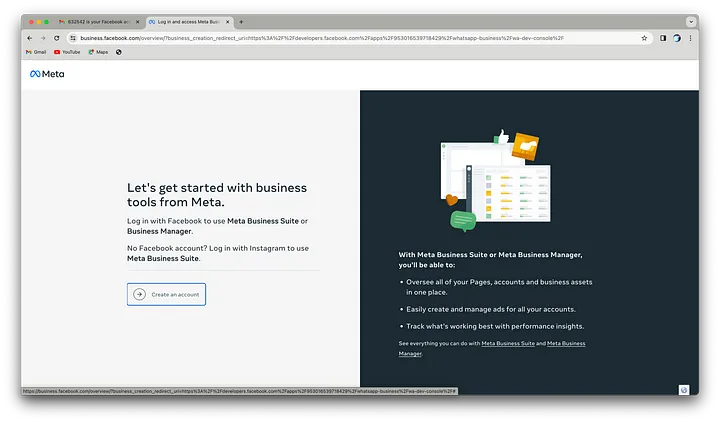
- Click “Continue” to be redirected to the Meta Business Portal.
- Click on “Create Account.”
- Fill in the required details:
- Business Name
- Your Name
- Business Email
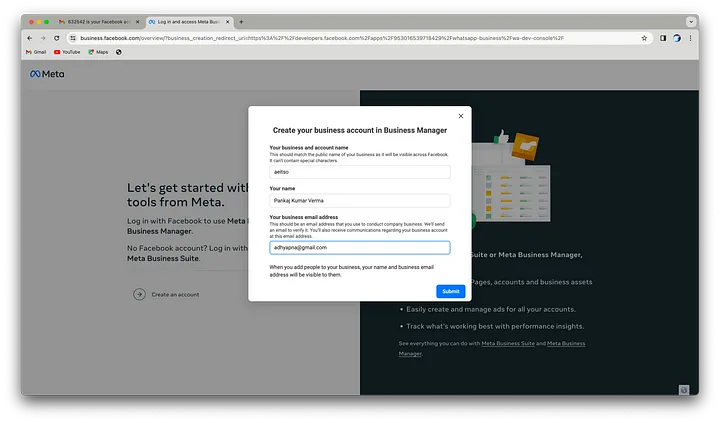
- Click “Done” to complete the account creation process.
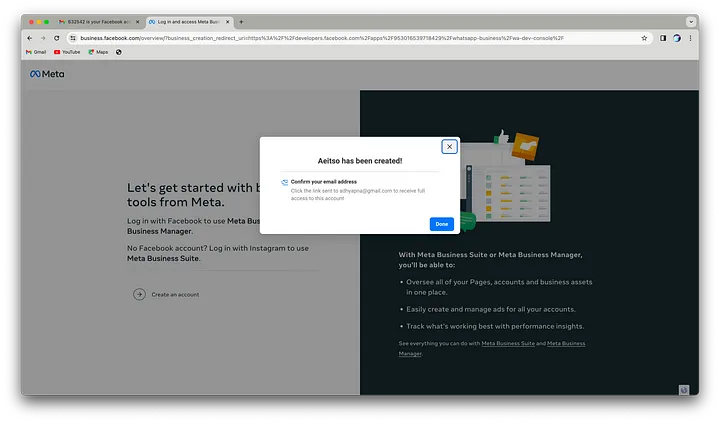
- Return to the Developer Portal
- After creating your Meta Business Account, you will be welcomed back to the Developer Portal.
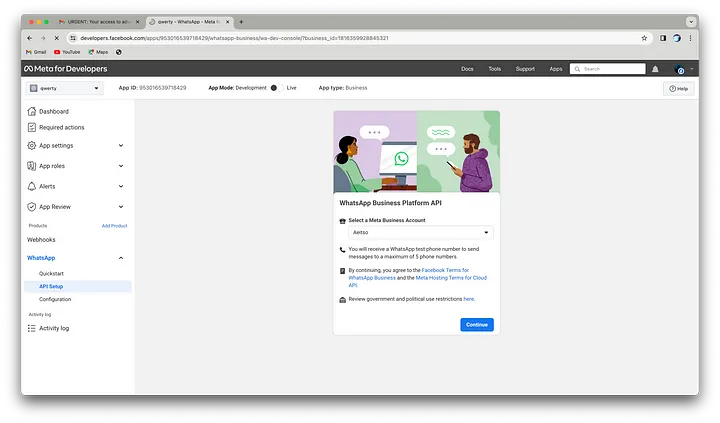
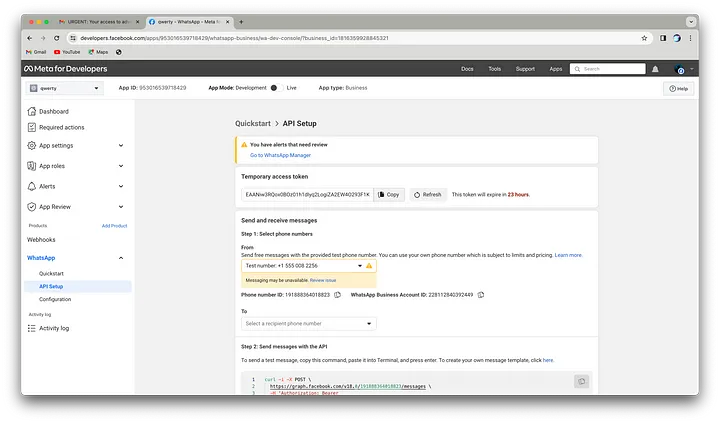
- Send a Test Message
- Add a recipient’s phone number.
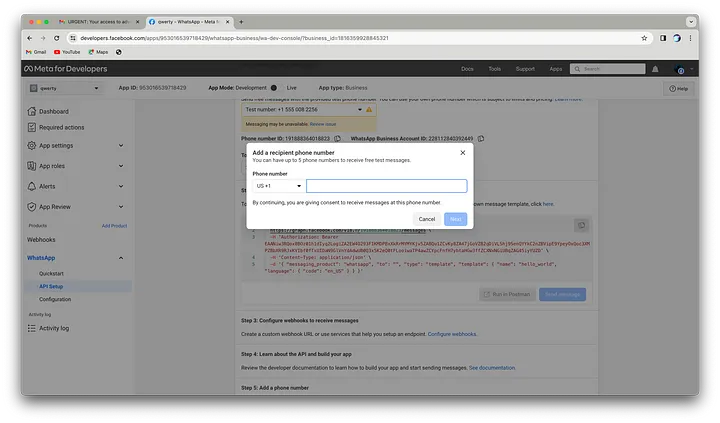
- Use a temporary token to test the WhatsApp API.
- Click “Send Message.”
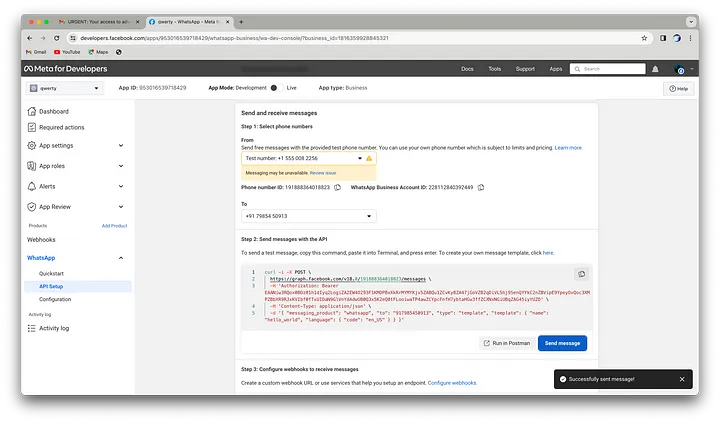
- Expect a toast notification confirming the message was sent successfully.
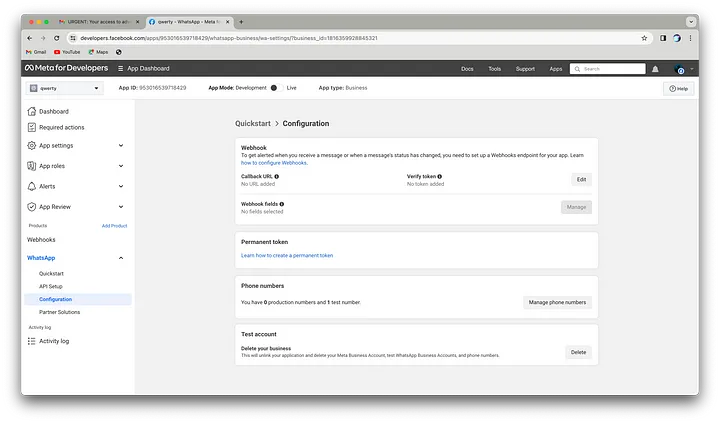
- Set Up the Webhook Endpoint
- Navigate to the configuration section.
- Input your webhook URL and permanent token.
- Click “Verify and Save” to establish the connection.
- Configure WhatsApp Business Account
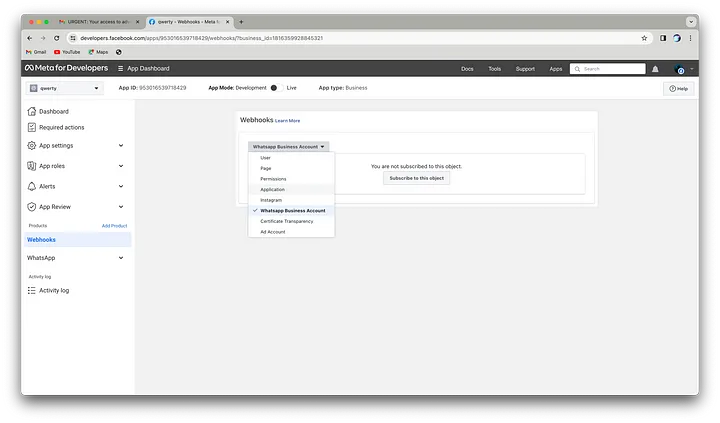
- Go to the webhooks section.
- Select the WhatsApp Business Account option.
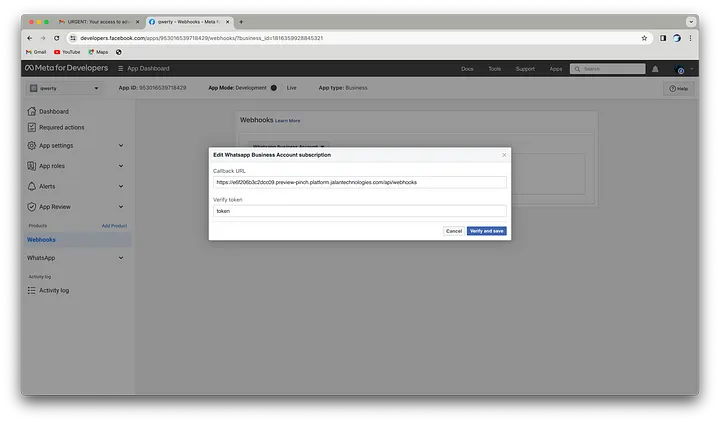
- Enter your webhook and token.
- Click “Verify and Save” to complete the setup.
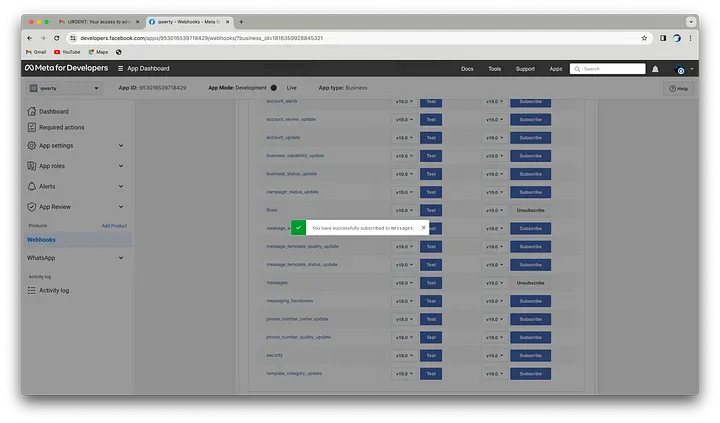
- Access Object Fields
- Once verified, explore the object fields your webhook can subscribe to. Test and subscribe to fields to tailor your integration.
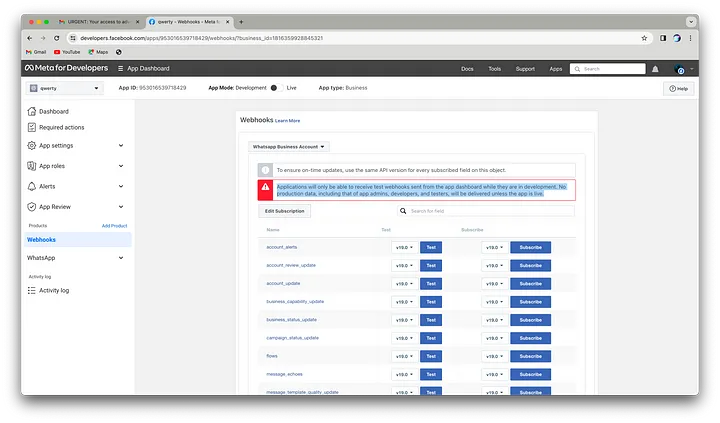
- Consult Documentation
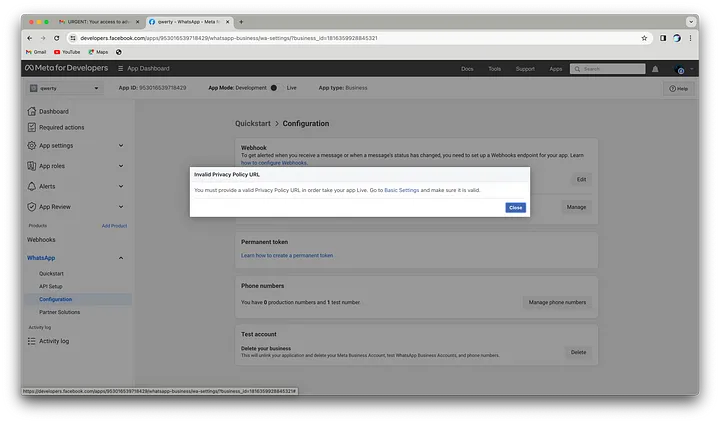
- Transition to Live Environment
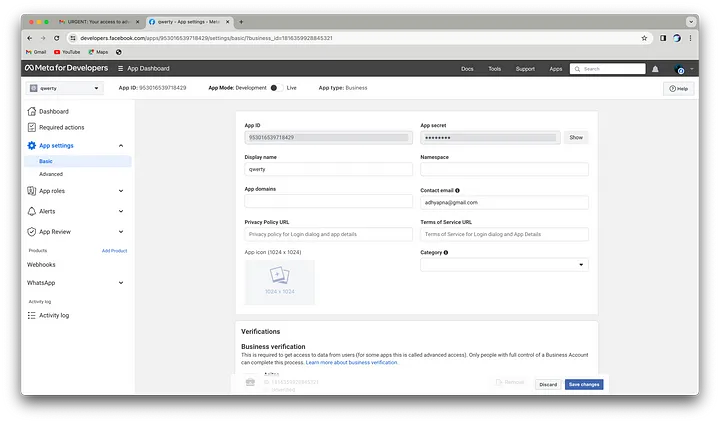
- Business Verification
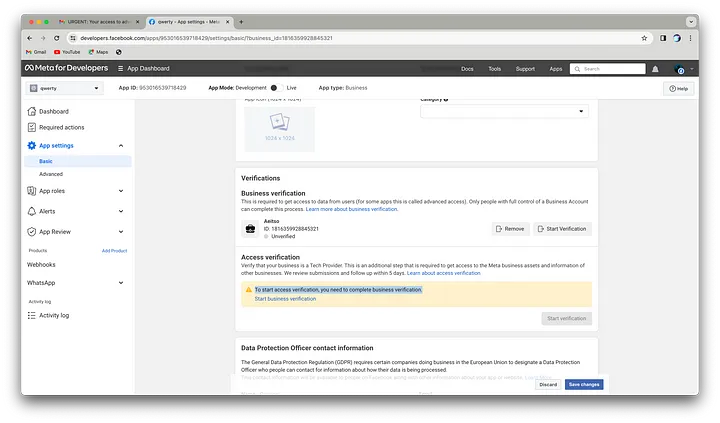
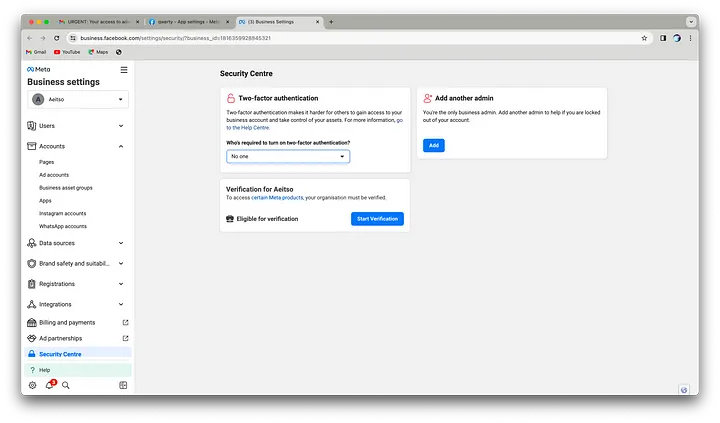
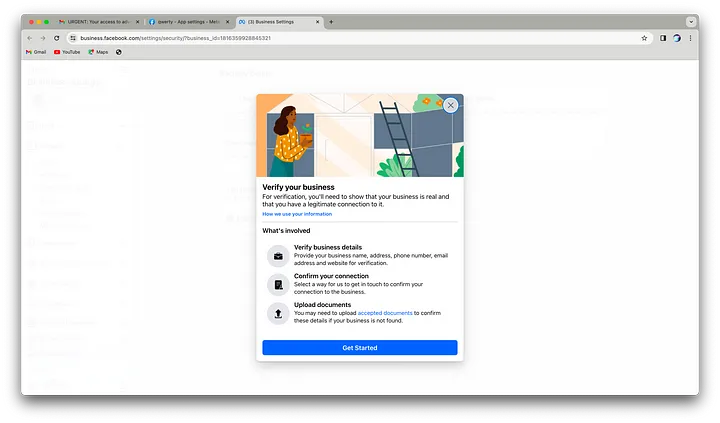
- Await Verification
- Unlock Meta Flow

