Steps
1
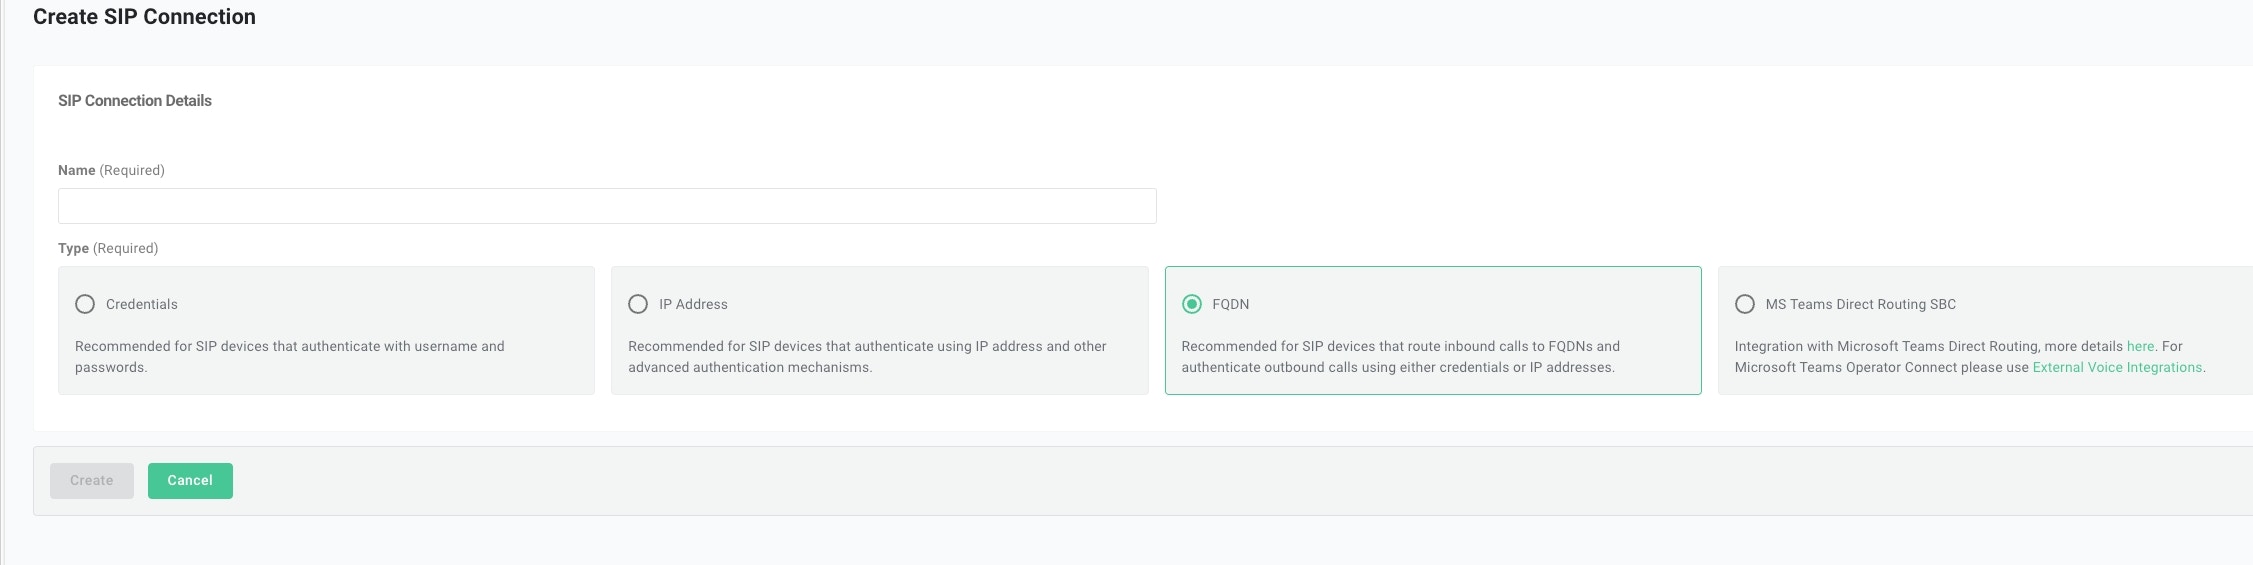
Create Elastic SIP Trunking
- Create the trunk, select FQDN as the type, and give it a name.
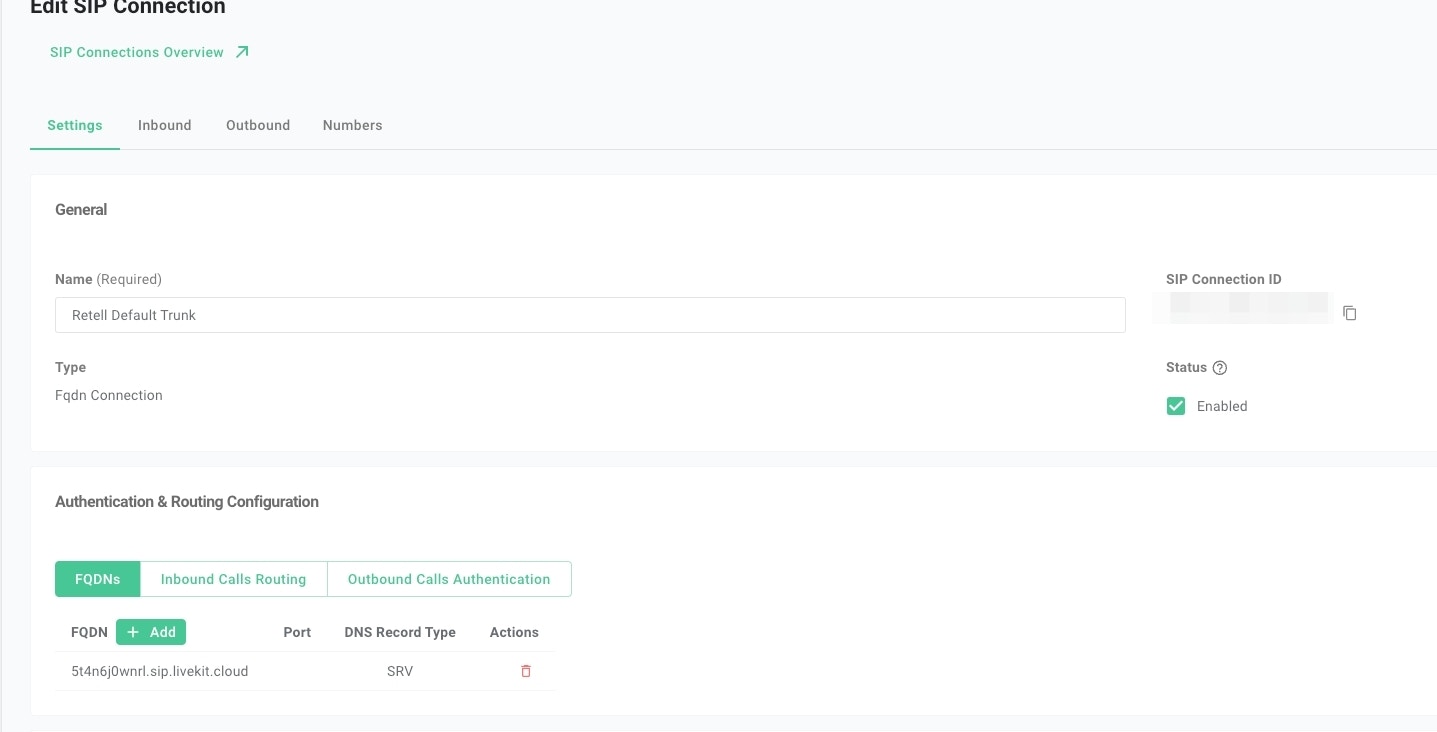
- Add FQDN Add the FQDN of PreCallAI’s SIP server:
sip:31.220.77.222:5060. SelectSRCas the DNS record type.
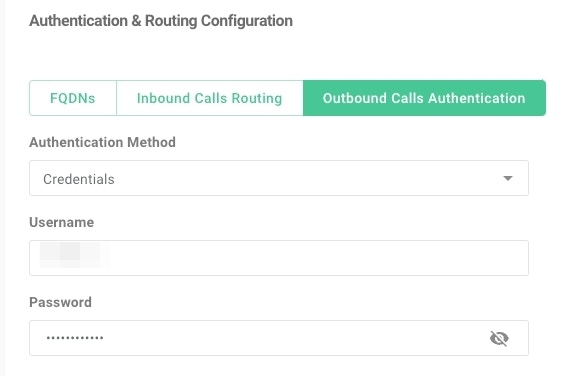
- Setup Outbound Calls Authentication
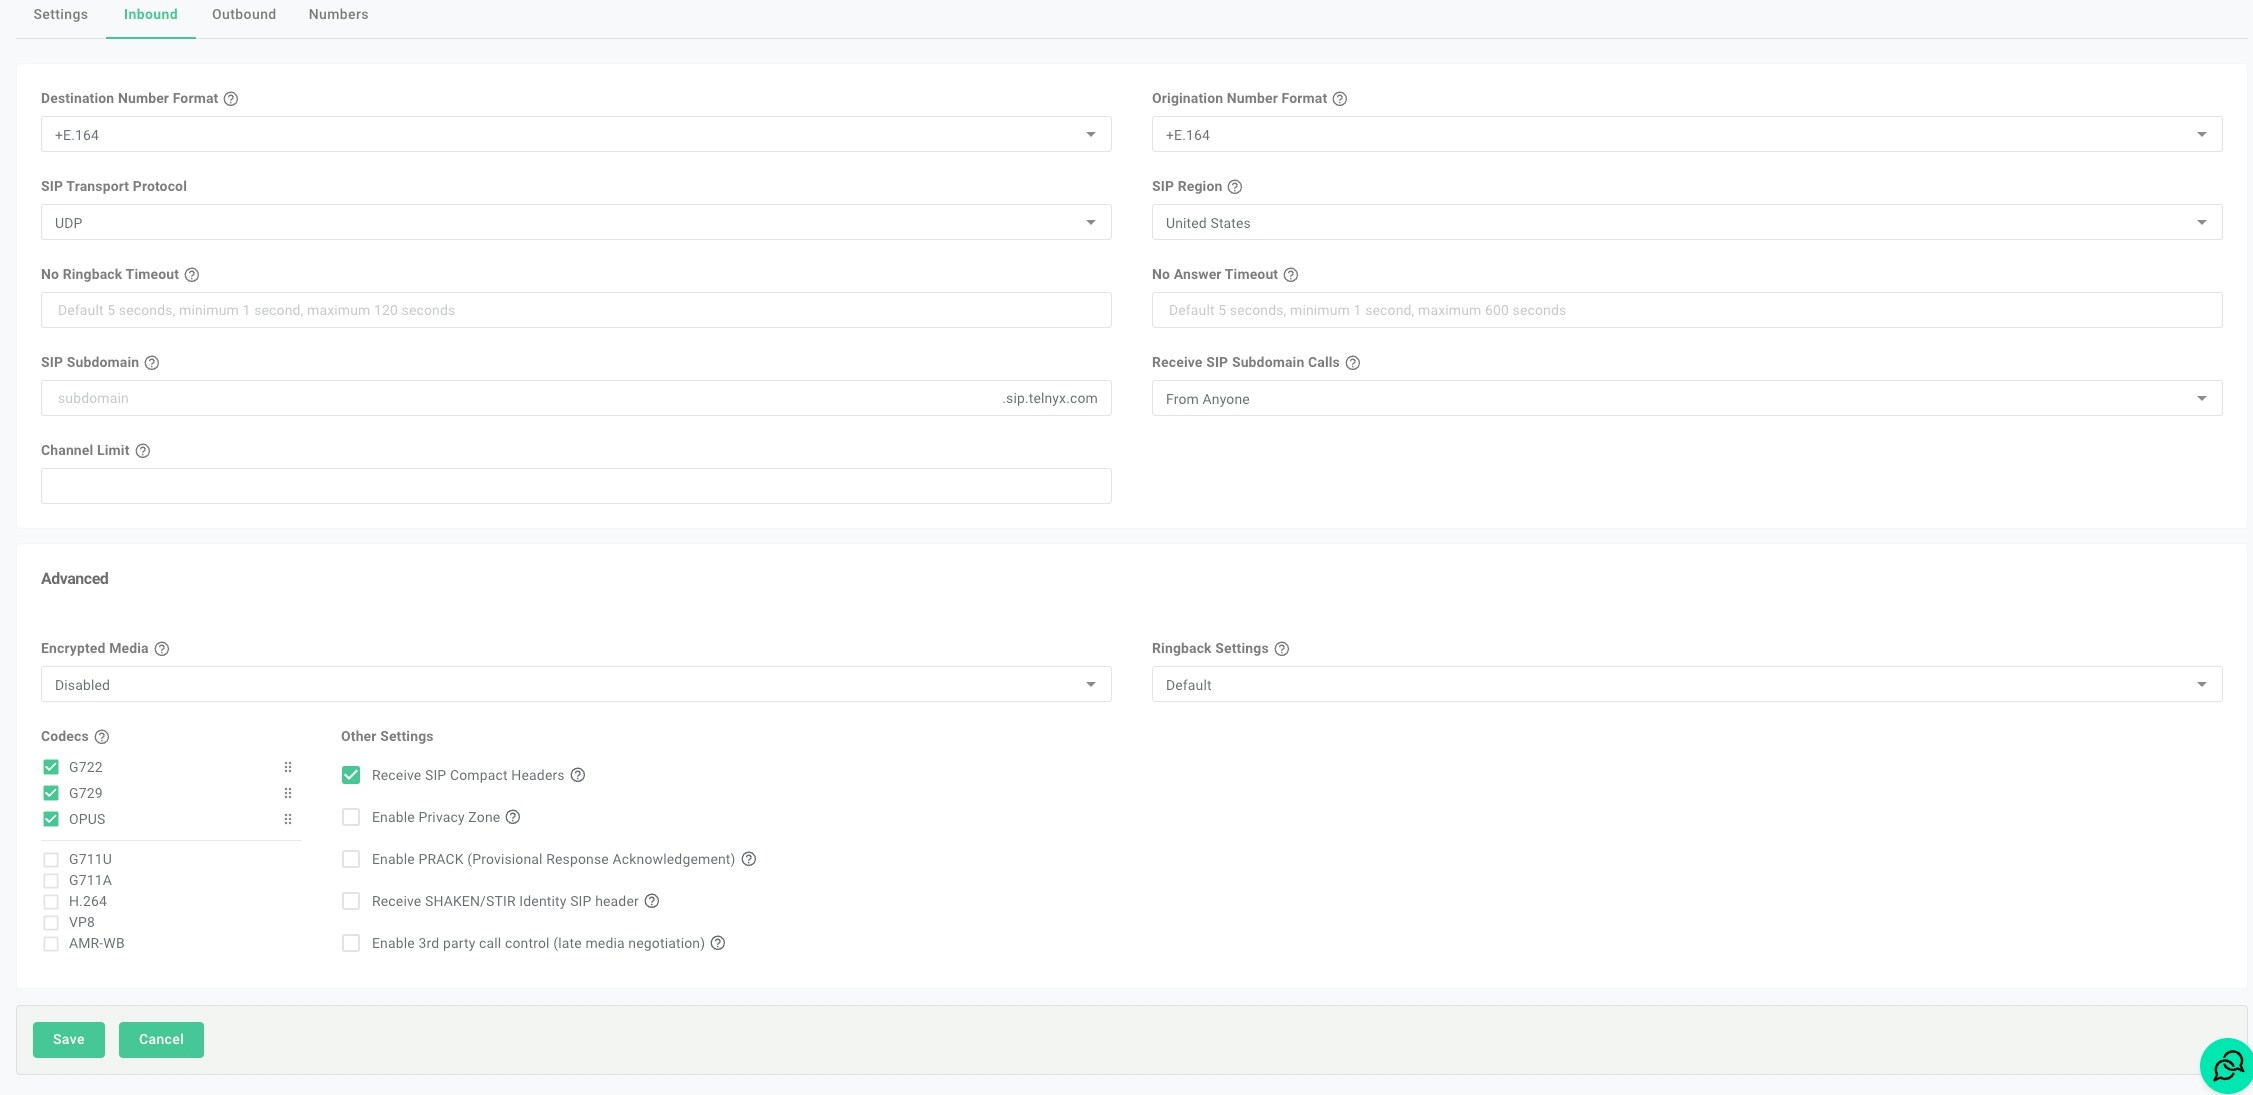
- Setup Inbound Setting
- Select
+E.164as the number format. - Select
G722,G729,OPUSas the codec. - Select
TCPas the transport method. (UDP temporarily not supported due to a connectivity issue) - Select your SIP region.
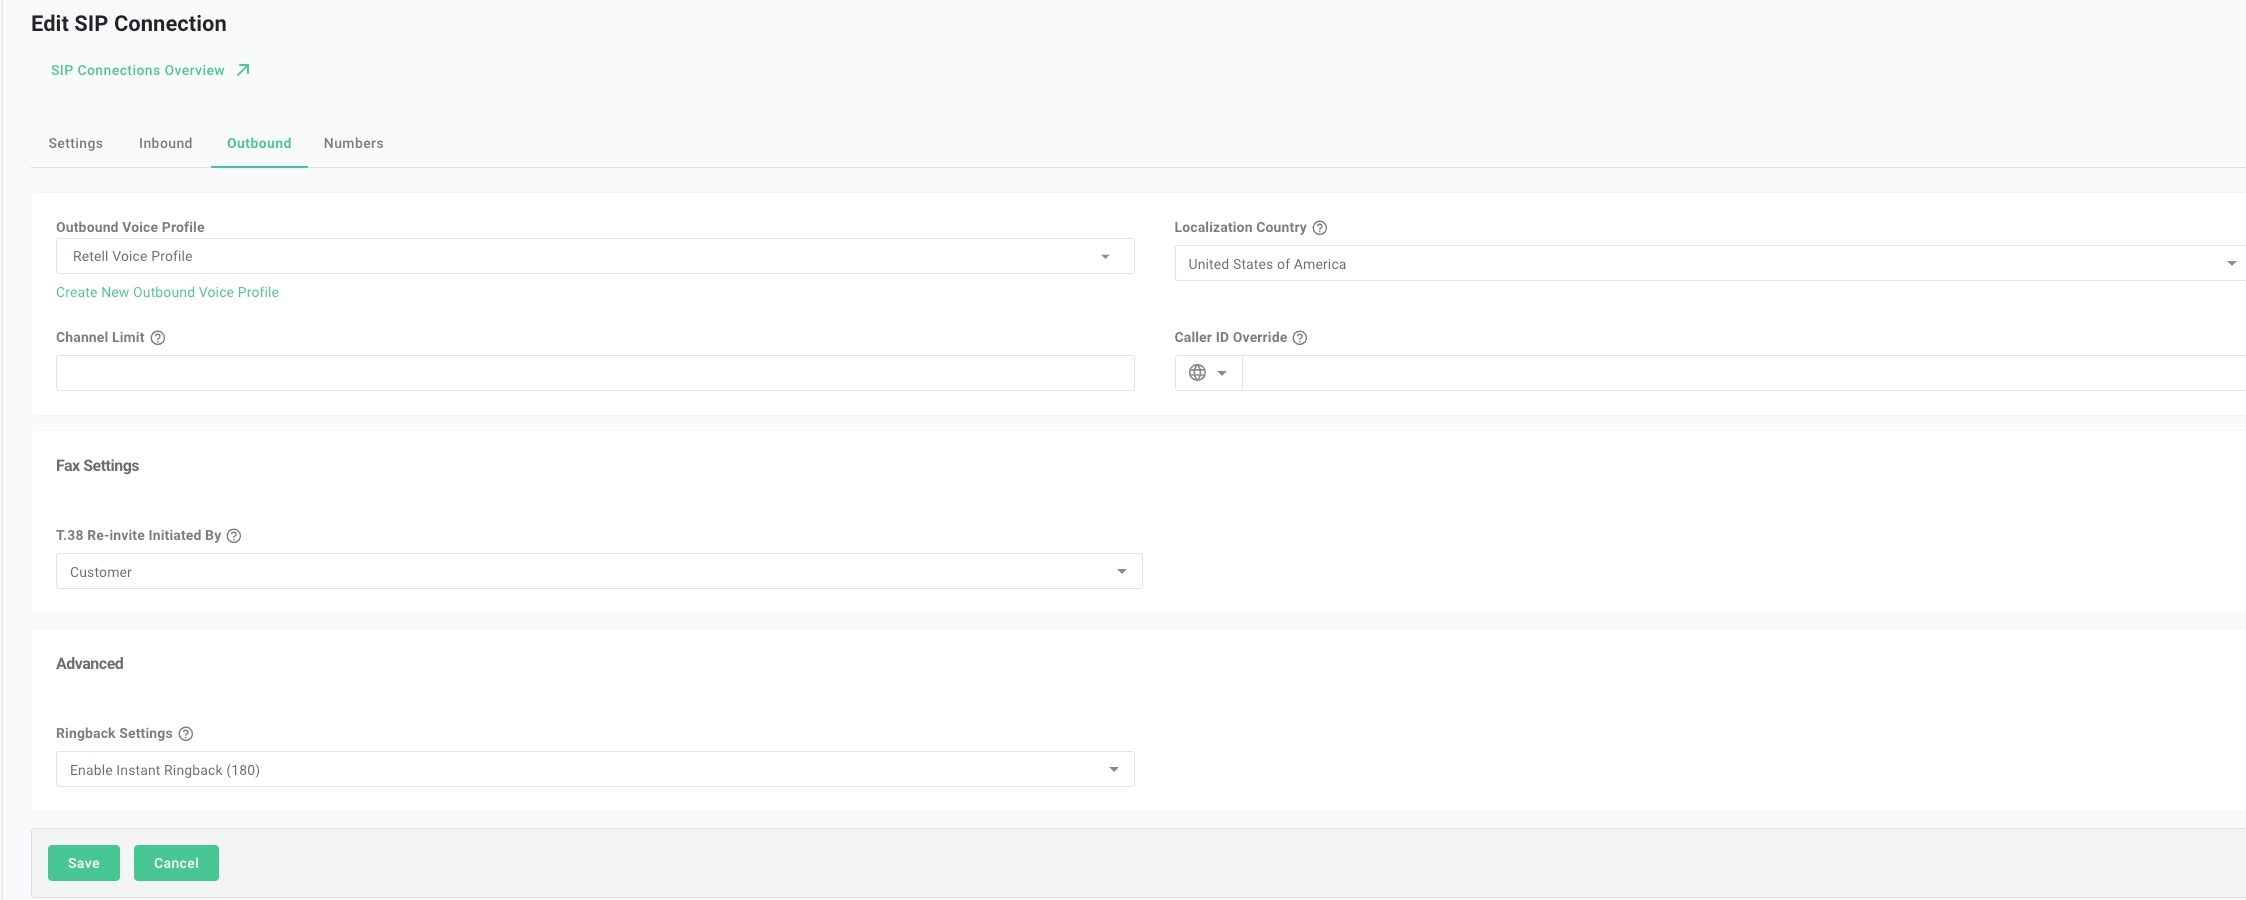
- Setup Outbound Setting
2
Move numbers to Elastic SIP Trunking
You’ve created the elastic SIP trunk, now you would need to purchase numbers / move existing numbers to this trunk.
3
Import numbers to PreCallAI
Now the number is set up with your elastic SIP trunking, you need to import the number to PreCallAI so that we will know how to route the call.