> ## Documentation Index
> Fetch the complete documentation index at: https://docs.precallai.com/llms.txt
> Use this file to discover all available pages before exploring further.
# WhasApp Access Token
> This page describes everything about whatsApp Access Token Generate
## Steps to Get a Permanent Access Token
1. Access [Business Settings:](https://turivishal.medium.com/permanent-access-token-for-whatsapp-business-apis-c81e1dfc86c7)
* Go to Business Settings.
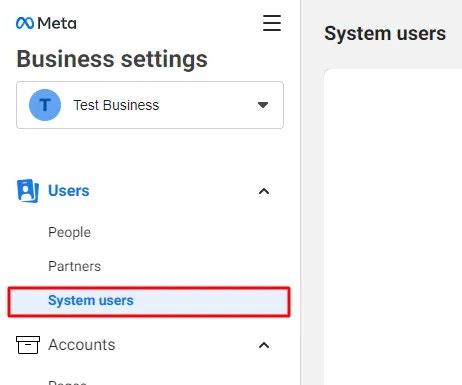
2. Navigate to System Users:
* Under Users, click on System Users.
 3. Create a System User:
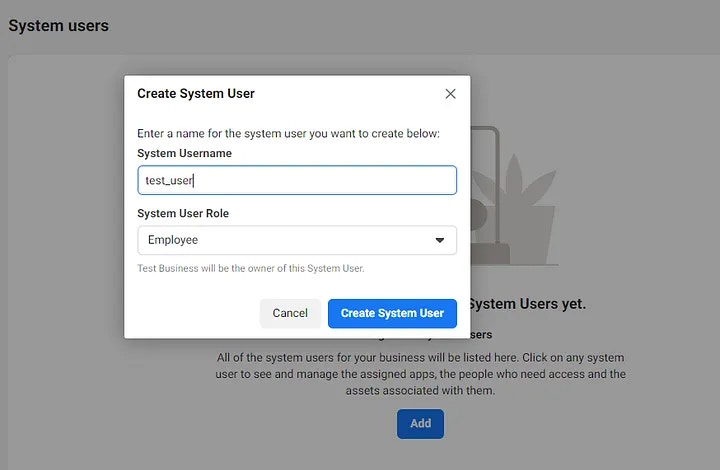
* Click the Add button.
* Provide a name for the system user.
* Select a role.
* Click Create System User.
 4. Accept Non-Discrimination Policy:
* Review and accept the non-discrimination policy on behalf of your system users.
5. Finalize Creation:
* After accepting the policy, click Done.
6. App Association (if needed):
* If you receive an error stating that an app must be part of the business, you need to create a Facebook app associated with your Business Manager first. Once the app is created, return to this step.
7. Add App:
* Under Accounts, click on Apps.
* Click the Add drop-down menu.
* Select Connect an App ID.
* Enter the Facebook app ID.
* Click Add App.
8. Assign assets such as your Pages, ad accounts, Facebook apps, and catalogues.
* Click on the Add Assets button, it will open a model and you can able to see, 1. Select asset type, 2. Select assets, and 3. App.
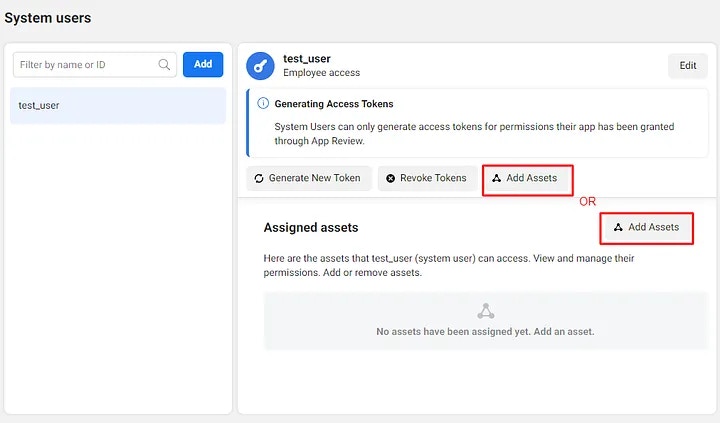 * Click on Apps under Select asset type, available in the left corner.
* Click on the Specific App’s checkbox(s) that you want to provide access to the current user under Select Assets, available in the middle section.
* Click on the Manage app toggle option and enable it for all access, you can customize it by other options available in this App section.
* Finally, Click on the Save Changes button.
* Click on Apps under Select asset type, available in the left corner.
* Click on the Specific App’s checkbox(s) that you want to provide access to the current user under Select Assets, available in the middle section.
* Click on the Manage app toggle option and enable it for all access, you can customize it by other options available in this App section.
* Finally, Click on the Save Changes button.
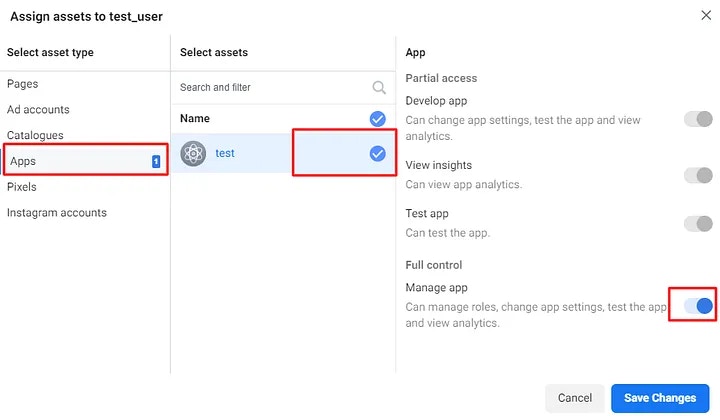 ### "Congratulations, you have added assets successfully."
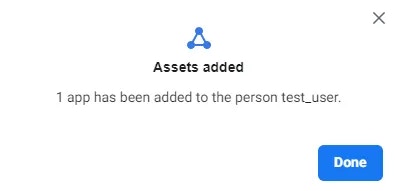 Now you can able to see the added assets in the Assigned assets
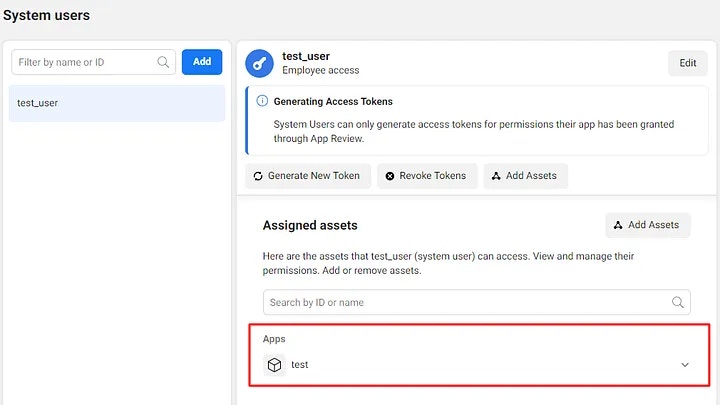 'Generate Access Token'
1. Click on the Generate New Token button.
'Generate Access Token'
1. Click on the Generate New Token button.
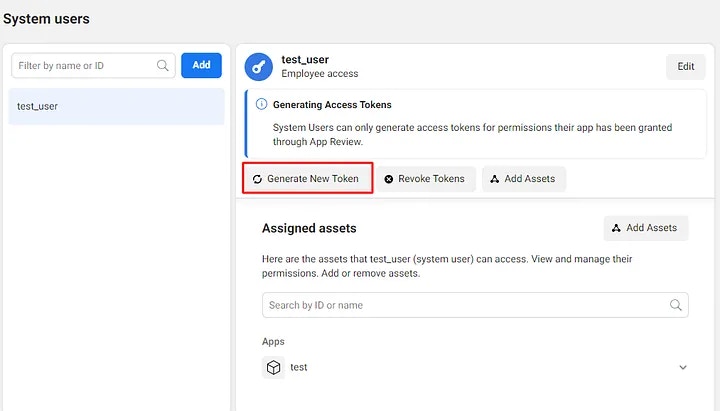 2. Select an App, That you want to generate a token for.
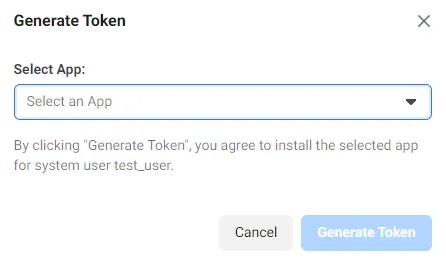 3. You can able to see the list of Info, Warnings, and a section Available permissions.
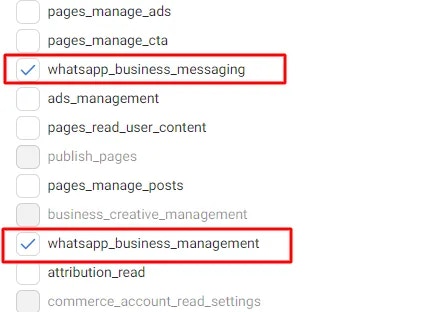
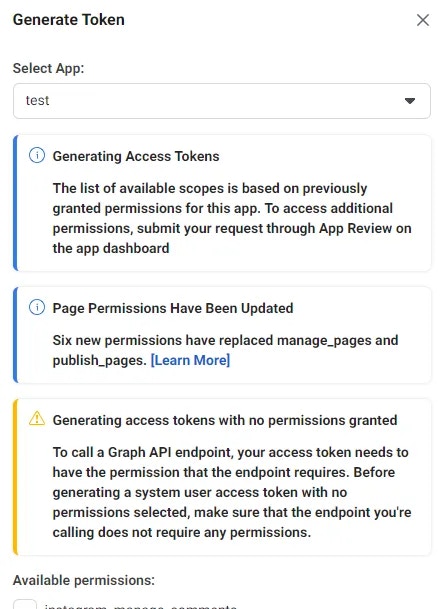 4. Scroll down to the Available permissions, there is a list of API components, you need to select “whatsapp\_business\_messaging” and “whatsapp\_business\_management” for WhatsApp Business APIs access and Click on the Generate Token button.
 5. It will appear as a model and you can able to see the newly generated Access Token, Just Copy the Access Token and store it in a safe place i.e. your project’s environment(env) file.
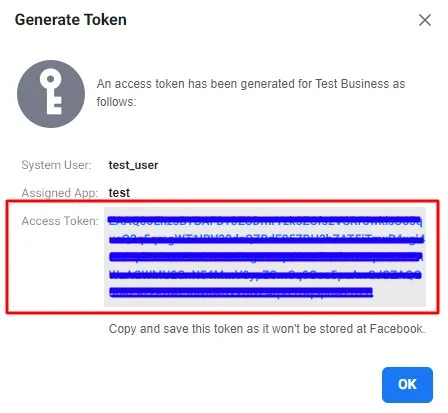 Copy and save this token as it won’t be stored on Facebook, Remember, you can
only share a token once. Each new system user requires a newly generated
token.
Copy and save this token as it won’t be stored on Facebook, Remember, you can
only share a token once. Each new system user requires a newly generated
token.